安装
参考: https://zhuanlan.zhihu.com/p/61542198 ● 在微软商店安装 
配置
修改根目录位置
参考: https://blog.csdn.net/Tiezhu_Wang/article/details/120588669
Microsoft Windows [版本 10.0.19044.1645]
(c) Microsoft Corporation。保留所有权利。

C:\Users\Administrator>wsl -l -v
  NAME            STATE           VERSION
* Ubuntu-20.04    Running         2

C:\Users\Administrator>wsl --export Ubuntu D:\u.tar
不存在具有提供的名称的分布。

C:\Users\Administrator>wsl --export Ubuntu-20.04 D:\u.tar

C:\Users\Administrator>wsl --unregister Ubuntu-20.04
正在注销...

C:\Users\Administrator>wsl --import Ubuntu-20.04 d:/ubuntu d:u.tar --version 2

C:\Users\Administrator>Ubuntu config --default-user root
Installing, this may take a few minutes...
Please create a default UNIX user account. The username does not need to match your Windows username.
For more information visit: https://aka.ms/wslusers
Enter new UNIX username: root
adduser: The user `root' already exists.
Enter new UNIX username: xinzhang
New password:
Retype new password:
passwd: password updated successfully
Installation successful!

C:\Users\Administrator>
搞定过后实际中间还有一层 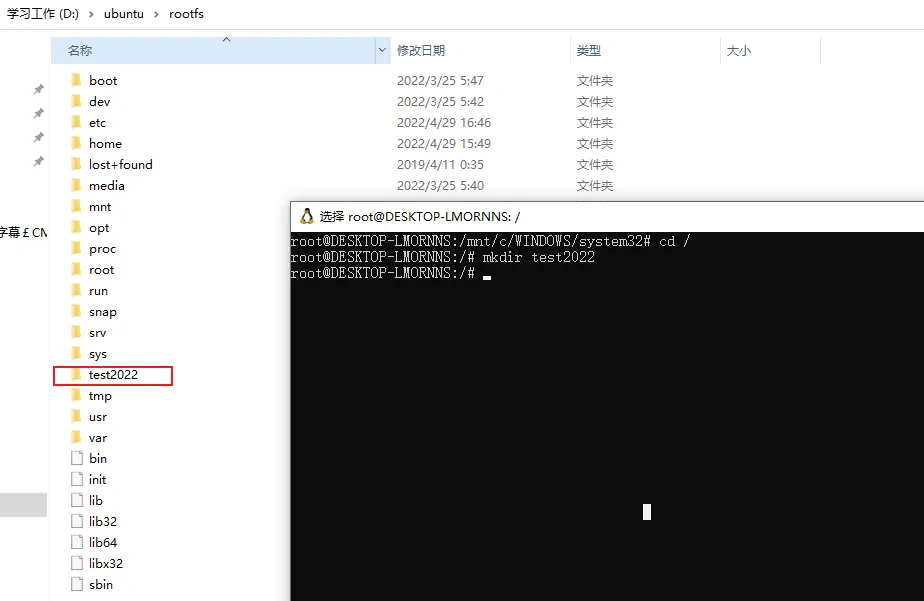
修改为国内软件源
sudo sed -i 's/archive.ubuntu.com/mirrors.aliyun.com/g' /etc/apt/sources.list
sudo sed -i 's/security.ubuntu.com/mirrors.aliyun.com/g' /etc/apt/sources.list
apt-get update
软件安装
docker
参考: https://docs.docker.com/engine/install/debian/
安装docker-desktop 官网: https://www.docker.com/products/docker-desktop/
docker-desktop集成wsl 参考: https://blog.csdn.net/weixin_48031922/article/details/116529198
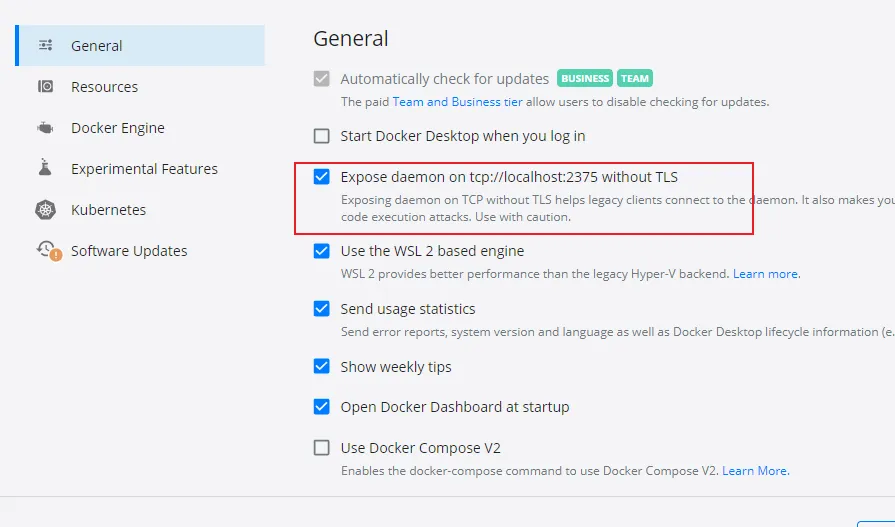
此处没有则需要先将wsl版本升级为2
# 查看版本
wsl -l -v

# 升级版本
wsl --set-version Ubuntu-20.04 2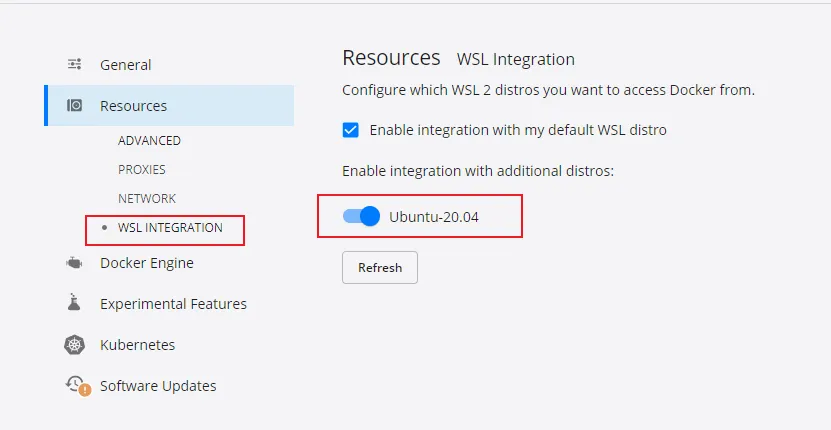
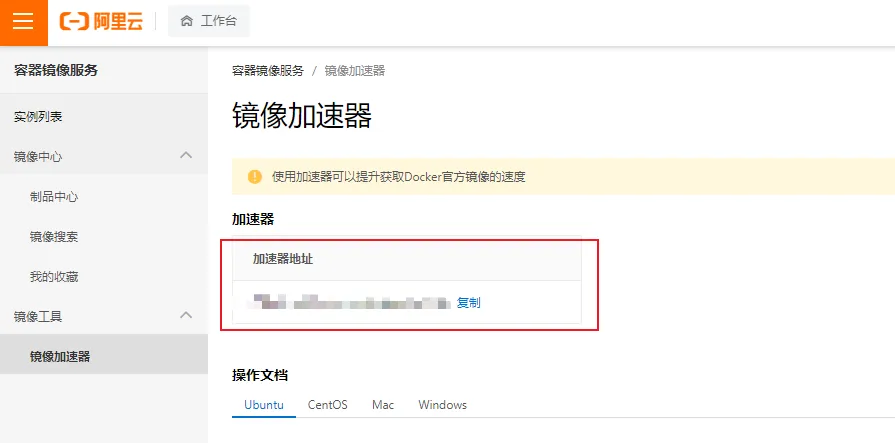
设置阿里云镜像加速器 注册地址: https://cr.console.aliyun.com/cn-hangzhou/instances/mirrors
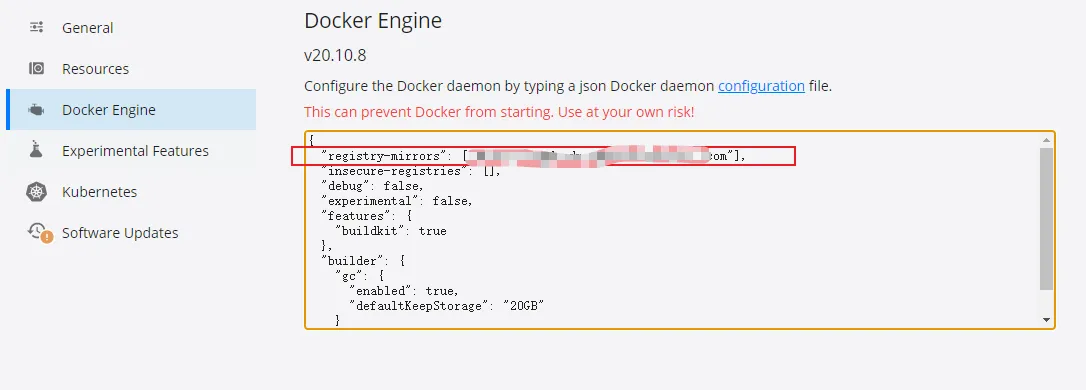
添加几个其他的镜像加速器 参考: https://www.runoob.com/docker/docker-mirror-acceleration.html
科大镜像:https://docker.mirrors.ustc.edu.cn/
网易:https://hub-mirror.c.163.com/
阿里云:https://<你的ID>.mirror.aliyuncs.com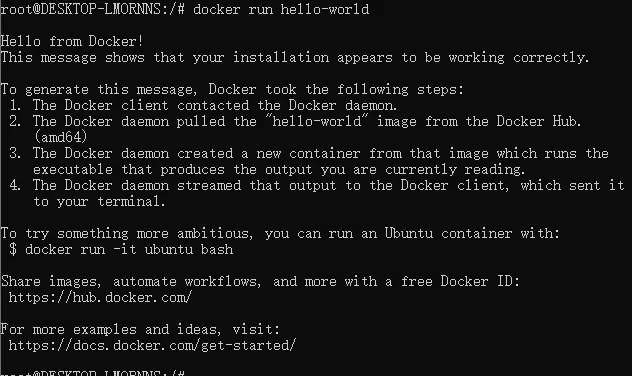
七牛云加速器:https://reg-mirror.qiniu.com- 测试
wsl2安装
官网: https://learn.microsoft.com/en-us/windows/wsl/install
- 直接打开PowerShell输入命令wsl --install即可,安装完需要电脑重启一次
- 重启后再打开wsl, 提示新建用户和密码,默认不是root用户,且root用户没有密码的,设置wsl默认为root用户可用wsl -u root(参考: https://learn.microsoft.com/en-us/windows/wsl/setup/environment#set-up-your-linux-username-and-password)
Oh My Posh主题美化
官网:https://ohmyposh.dev/docs/installation/windows
PowerShell美化
- 安装Oh My Posh
winget install JanDeDobbeleer.OhMyPosh -s winget- 下载字体, 官方建议选MesloLGM NF, 下载完成后设置powershell的字体为这个
oh-my-posh font install- 更改shell的主题配置, 重启即可 输入$Profile, 拿到配置文件路径(没有该文件则新建),加上
# 注意将config的路径改成主题文件的路径, win下的路径一般跟下面类似
oh-my-posh --init --shell pwsh --config C:\Users\xinzhang0618\AppData\Local\Programs\oh-my-posh\themes\catppuccin.omp.json | Invoke-Expression
Wsl(Bash)美化
- 安装oh my posh
sudo wget https://github.com/JanDeDobbeleer/oh-my-posh/releases/latest/download/posh-linux-amd64 -O /usr/local/bin/oh-my-posh
sudo chmod +x /usr/local/bin/oh-my-posh

mkdir ~/.poshthemes
wget https://github.com/JanDeDobbeleer/oh-my-posh/releases/latest/download/themes.zip -O ~/.poshthemes/themes.zip
unzip ~/.poshthemes/themes.zip -d ~/.poshthemes
chmod u+rw ~/.poshthemes/*.omp.*
rm ~/.poshthemes/themes.zip- 设置wsl的字体,上边下载过了, 此处直接设置wsl即可
- 更改~/.bashrc文件,加上
# 一样需要注意主题文件的路径
eval "$(oh-my-posh --init --shell bash --config /mnt/c/Users/xinzhang0618/AppData/Local/Programs/oh-my-posh/themes/catppuccin.omp.json)"